
A microservices application
Let’s assume that we are developing a microservices application, for example an online shop. In essence, our webshop consists of a front-end application that communicates with a backend via an API. For simplicity, let’s say our backend looks like this:
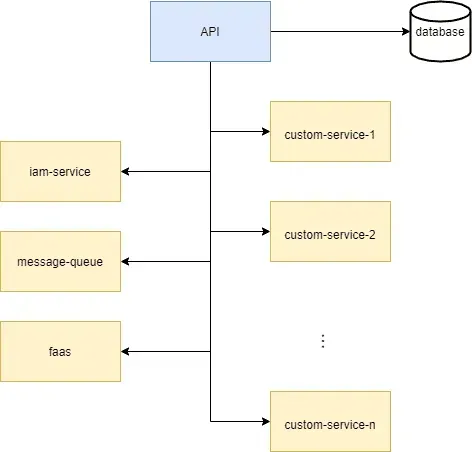
User management is provided by the iam service. Orders are processed via the message queue. Most of the business logic in our backend is wrapped in serverless functions served by faas. The state of our application is kept in our database. Finally, for some good reasons (e.g. ease of test configuration), we are developing our software in a monorepo.
Over time, our microservices application will necessarily contain a lot of business logic that will be wrapped up in even more microservice code or serverless functions. For example, we might need a connector service between our message queue and our faa, or an asset service with some logic to add new assets in a controlled way. A very practical way to host our microservices is to dock them and let Kubernetes orchestrate them.
Usually our IAM service is a third party like keycloak or fusionauth that we can easily deploy on Kubernetes using a helm diagram. Helm is a very handy package manager for Kubernetes. For example, a typical fusionauth deployment would look something like this:
helm repo add fusionauth https://fusionauth.github.io/charts
helm install fusionauth --create-namespace fusionauth/fusionauth --namespace auth \
	--set database.protocol=postgresql
	--set database.user= \
	--set database.password= \
	--set database.host= \
	--set database.port= 5432
	--set database.name= \
	--set database.root.user= \
	--set database.root.password= \
	--set app.runtimeMode=production
	--set search.engine=database
Our message queue is probably redismq, rabbitmq or kubemq, for which we also easily find bar charts.
Then come our own custom services for which we need to write our own Kubernetes resources (deployments, services, ingresses, etc.). Finally, we can write some kind of script to install all the necessary bar charts and apply our Kubernetes resources.
Because our software deals with sensitive data and does our business, we have to be careful when we deploy a new version. Therefore, we want to test it in some way before releasing it, which is very easy to do on Kubernetes clusters. Indeed, we can imagine that we have two environments, one for testing and one for production. The test (or staging) environment would be synchronised with the main branch of our software repository while the production environment would be the counterpart of the production branch of our repository. We develop on the main branch and, as soon as Q&A is happy with the software being pushed there, we push it to production.
We are now in a complicated situation where we want to develop our software on a development machine, test it in some way on an almost productive environment, and release it into a production environment. This leads us to three different build and deployment procedures. On a development machine, we surely want to interact with an ephemeral database. Also, the login credentials for our microservices (such as the asset management service) must be trivial. On a development machine, we may want to grant unprotected access to some of our services for debugging purposes. In production, we want to secure and hide as much as possible.
Finally, if our development environment was close to the production environment, we would minimise the surprises that follow a deployment to staging or production, which would increase our productivity.
Entering the devspace
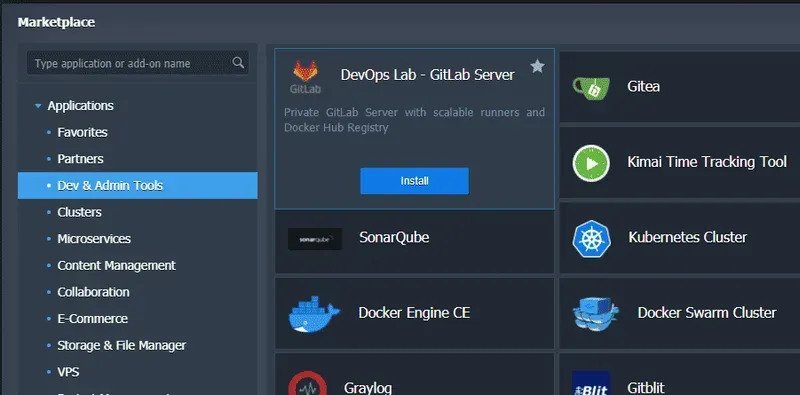
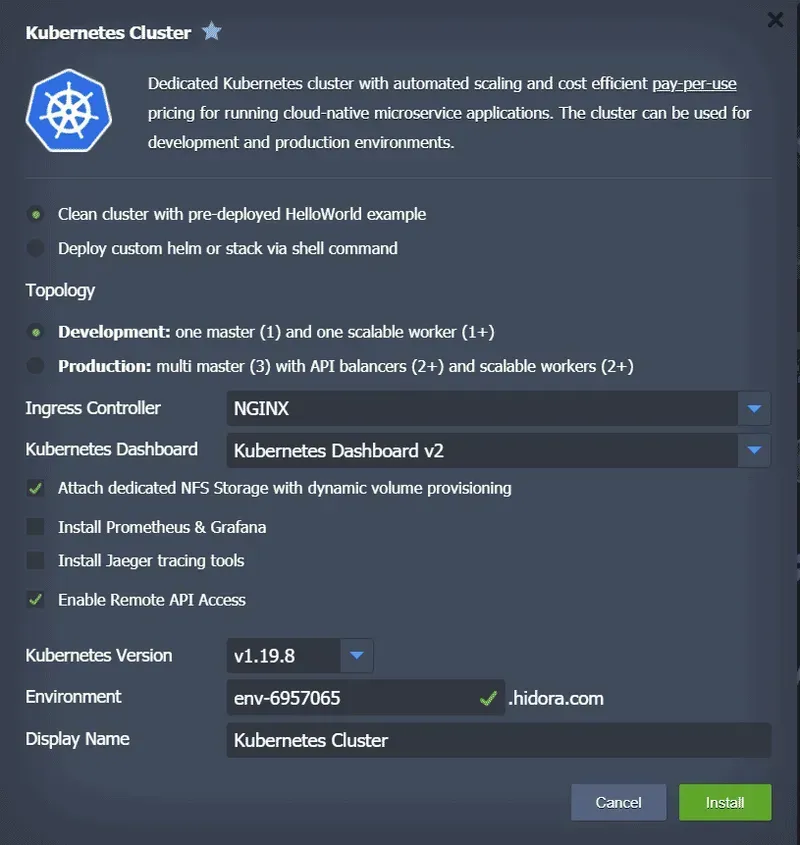
Devspace is a clique tool that allows us to automate both the building and deployment of container images. In addition, this tool could just as easily replace our makefile or docker-compose configurations and offers us the possibility to do Kubernetes-based development. Thanks to this last possibility, let’s assume we have set up a small cluster on our development machine. With one click, you can ask Jelastic to configure this development cluster for you via a very simple interface.
You can also manually set up your own desktop cluster type, minikube or docker.
The easiest way to install devspace (not on your Kubernetes cluster, but on a remote machine from which you develop your code!
npm install -g devspace
Then, depending on our use case, we could run
devspace init
and follow the instructions. In our particular case, we want to build
- our API
- a set of customised microservices
This is what we do with the following configuration:
version: v1beta10
vars:
- name: SOME_IMPORTANT_VARIABLE
	source: env
	default: the-important-value
images:
	my-custom-service:
		image: my-repo/my-custom-service
		tags:
		- ${DEVSPACE_RANDOM}
		dockerfile: ./my-custom-service/Dockerfile
		context: .
		build:
			docker:
				options:
					target: app
					buildArgs:
						SOME_IMPORTANT_VARIABLE: ${SOME_IMPORTANT_VARIABLE}
api:
	image: my-repo/api
	tags:
	- ${DEVSPACE_RANDOM} dockerfile: ./api/Dockerfile
	context: .
The above configuration defines how to build our API and microservices. When pushed to their docker registry, both docker images will have the same random label (defined by the DEVSPACE_RANDOM built-in variable). Instead of using a docker daemon, we can also choose to use custom build commands or kaniko. We can use environment variables, such as SOME_IMPORTANT_VARIABLE and provide the usual options for building docker images.
Secondly, we want to deploy
- our API
- our customised microservices
- various third party services (iam, message queue, faas, assets)
To take care of this, we complete the previous configuration with the following snippet:
deployments:
# for the custom service, we have regular k8s manifests
- name: my-custom-service
	kubectl:
		manifests:
		- my-custom-service/manifest.yaml
# for the api, we have written a helm chart
- name: api
	helm:
		chart:
			name: api/chart
		values:
			image: my-repo/api
			postgres:
				database: my-database
				hostname: postgres
				username: my-username
				password: my-password
# the database service is a 3rd party
- name: postgres
	helm:
		chart:
			name: postgresql
			repo: https://charts.bitnami.com/bitnami
		values:
			postgresqlDatabase: my-database
			postgresqlUsername: my-username
			postgresqlPassword: my-password
# the iam service is a 3rd party
- name: iam-service
	helm:
		chart:
			name: fusionauth/fusionauth
		values:
			database:
				protocol: postgresql
				user: iam-user
				password: iam-password
				host: postgres
				name: iam-database
					user: root-db-username
					password: root-db-password
			search: engine: database
The first deployment, my-custom-service, consists of
kubectl apply -f my-custom-service/manifest.yaml
The second deployment, api, is an ordinary helm installation. Instead of writing our own helm diagram, we could have used the built-in component diagrams which offer a compromise between defining our own helm diagrams and keeping the configuration of our Kubernetes resources simple. With our current devspace configuration in place, we can start our :
devspace dev
This command builds our docker images and deploys our software to the default namespace of our development Kubernetes cluster. We are now in a situation where we can develop our code on our development machine and push it to our development Kubernetes cluster. With hot reload or auto reload, we can even fix our code and the result is automatically propagated to our cluster.
Deploying in multiple environments
We now have a configuration that works for development. We are not too far from the configuration of our staging environment. Firstly, our docker images should be tagged following the /:staging- pattern. Secondly, our staging environment relies on an external database and IAM services. Therefore, we don’t want to deploy them on staging and we need to adapt the services that depend on them. In devspace we can define profiles. So far, our configuration does not refer to any profile, so it is the development profile. We can define the staging profile, let it be based on the development profile and adapt it as we have just described. To do this, we add the following configuration to our devspace.yaml :
profiles:
- name: staging
	patches:
	# images -> adapt tag
	- op: replace
		path: /images/0=${DEVSPACE_RANDOM}
		value:
		- staging-${DEVSPACE_GIT_COMMIT}
	# postgres -> remove, we have an external database
	- op: remove
		path: /deployments/name=postgres
	# iam service -> remove, we have an external iam service
	- op: remove
		path: /deployments/name=iam-service
	# api
	# -> we need an ingress
	- op: replace
		path: /deployments/name=api/helm/values/ingress
		value:
			enabled: true
			annotations:
				kubernetes.io/ingress.class: nginx-cert
				cert-manager.io/cluster-issuer: letsencrypt-prod
			hosts:
			- host: api-staging.my-staging-domain.com
				paths:
				- /
			tls:
			- secretName: api-tls
				hosts:
				- api-staging.my-staging-domain.com
	# -> we need up-to-date database accesses
	- op: replace
		path: /deployments/name=api/helm/values/postgres
		value:
			database: my-external-database
			hostname: my-external-database-hostname
			username: my-external-username
			password: my-external-password
	# my-custom-service -> nothing to do
We can of course follow the same philosophy coupled with the concept of parent profiles to define our production profile. Then, building and deploying to the test phase or production is as simple as
devspace deploy -p staging
devspace deploy -p production
Of course, remote debugging of these profiles is also possible.
We have only scratched the surface…
Many other features are available, such as custom command definition, (reverse) port forwarding, file synchronisation, container log streaming, etc . Used judiciously in CI/CD pipelines, devspace can greatly simplify the way you release your software.